Preparing Your Garden for a Northern Ontario Spring

In Northern Ontario, the frost can linger in the soil well after the snow has melted from the surface. While many gardeners in Southern Ontario are already out with their trowels, we know the real work in Smooth Rock Falls involves waiting for the ground to actually thaw. This guide covers the specific timing, soil preparation, and tool maintenance required to handle our shorter, more intense growing seasons.
When is the Best Time to Start Planting in Northern Ontario?
The best time to start planting in our region is typically after the danger of the last frost, which in the Cochrane District often falls in late May or even early June. You shouldn't rush the process just because the sun feels warm in April. If you plant too early, a sudden snap freeze will kill your seedlings instantly.
Wait for the soil temperature to hit at least 10°C (50°F) before you even think about moving perennials. It's a common mistake to see a warm week in May and assume the season has begun. It hasn't. The ground is still holding onto that deep winter chill.
Keep a close eye on the USDA Plant Hardiness Zone map or local Canadian equivalents to understand what can actually survive a Northern Ontario winter. We are often in a different zone than the folks down in Toronto, and that matters for your plant choices.
The Soil Temperature Checklist
- Late April: Clear debris and old leaves, but don't dig yet.
- May: Test soil moisture; if it's a swamp, wait.
- Early June: The safest window for most tender vegetables.
- Late June: The "no-fail" window for heavy hitters like tomatoes.
How Do I Prepare My Soil for the Growing Season?
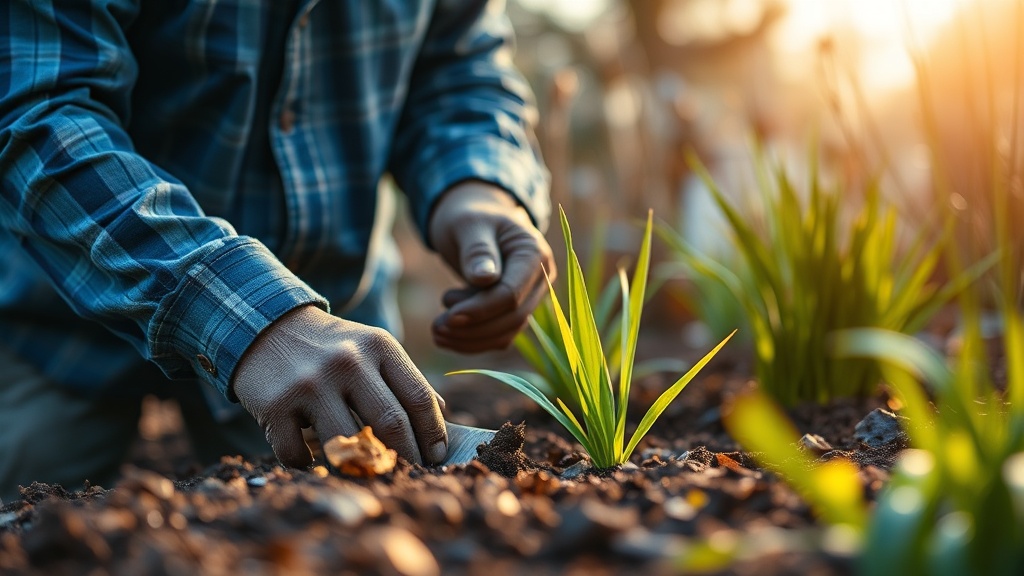
Preparing your soil involves testing the pH, adding organic matter, and removing the debris left over from the long winter. Our soil in this part of Ontario can be quite acidic or heavily clay-based depending on your specific lot. You'll want to know what you're working with before you spend money on expensive fertilizers.
Start by clearing out the "winter mulch"—that's the layer of dead leaves and old grass that's been matted down. Don't just rake it away; if it's clean, it can become compost. If it's full of weed seeds, toss it. You don't want to accidentally spread invasive species into your clean beds.
Next, look at your soil structure. If it feels like a brick when it's dry, you need to add compost or well-rotted manure to improve drainage. This is also a great time to think about getting your backyard ready for local wildlife by ensuring your soil health supports a healthy ecosystem. Healthy soil means more than just better vegetables; it means a better habitat for the birds and small mammals that visit our area.
I usually recommend using a basic soil testing kit from a local hardware store. It's cheap, it's easy, and it saves you from the headache of guessing. It's much better to know your nitrogen levels now than to wonder why your plants look yellow in July.
| Amendment Type | Best Used For | When to Apply |
|---|---|---|
| Compost | General soil structure & nutrients | Early Spring |
| Peat Moss | Increasing acidity (for blueberries/azaleas) | At Planting |
| Bone Meal | Slow-release phosphorus for root growth | Early Season |
| Perlite | Improving drainage in potting mixes | During Potting |
What Tools Do I Need for Spring Gardening?
You need a sturdy shovel, a hand trowel, a garden rake, and a high-quality pair of bypass pruners. Don't bother with the cheapest plastic tools you find at a big-box store; they'll snap the first time you hit a stubborn root. Investing in a real brand like Fiskars or Felco makes a massive difference in how much work you actually enjoy doing.
Clean your tools before you start. It sounds tedious, but it's not. Using a dirty shovel to move soil can introduce pathogens or fungi that have been dormant in your garage all winter. A quick wipe with some rubbing alcohol or a spray of diluted bleach is plenty. (Just don't forget to rinse it off!)
If you're working with raised beds, a hand cultivator is a lifesaver. It's much easier than using a full-sized hoe for small areas. I've found that a simple, well-maintained hand tool is often more effective than a bunch of specialized gadgets that end up sitting in a drawer by August.
Tool Maintenance Comparison
- The Basic Set: Shovel, Trowel, Rake, Watering Can. (Good for beginners).
- The Intermediate Set: Adds Pruners, Hand Cultivator, and a Garden Fork. (Good for established beds).
- The Pro Set: Adds Soil pH Tester, Spray Bottle, and specialized Seedling Trays. (For the serious enthusiast).
How Can I Protect My Plants from Late Frosts?
You can protect your plants by using frost blankets, row covers, or even plastic jugs of water to regulate temperature. In Northern Ontario, a "warm" night in May can turn into a freezing night by 3:00 AM without any warning. This is why we have to be more vigilant than gardeners in the south.
If you see the temperature dropping significantly in the overnight forecast, get your covers out. A simple piece of burlap or even an old bedsheet can act as a shield. Just remember—never cover plants with a plastic sheet that touches the leaves directly. The moisture trapped underneath can actually cook your plants or cause rot. You want airflow.
One trick I've used is placing empty, water-filled milk jugs around the base of sensitive plants. The water absorbs heat during the day and releases it slowly at night. It's a bit of a "MacGyver" move, but it works in a pinch. It's a low-cost way to prevent a total loss of your hard work. That said, it isn't a perfect solution for a deep freeze.
Always keep an eye on the weather. If the local forecast shows a dip below 4°C, it's time to bring your potted plants indoors or cover your garden beds. It's better to be safe and slightly inconvenienced than to lose your entire tomato crop before it even starts to fruit.
The soil is the foundation of everything you'll do this year. If you get the prep right in the spring, the rest of the summer is much more manageable. It's all about working with the environment we have here, rather than fighting against it. We've got a short window, so make it count.
Steps
- 1
Clean up winter debris
- 2
Test and amend your soil
- 3
Plan your seasonal layout